1. First impression
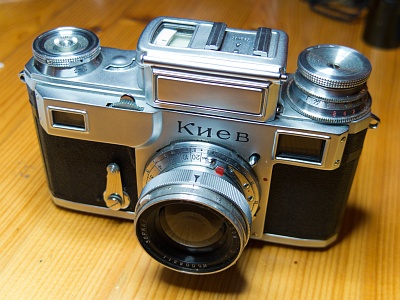
It looks really nice. The paintwork, chrome and leather are practically as good as new.
However, the shutter only worked in slow motion.
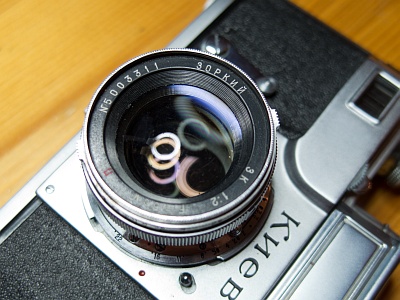
Interestingly, it was supplied with a "Zorki ZK" lens. Since it was only built until 1950, it doesn't actually fit the camera.
However, the pristine condition of the camera gives me hope that the lens was actually delivered with the camera at the time.
2. Trigger
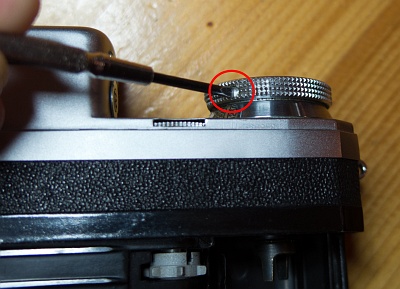
A few steps are necessary to access the shutter.
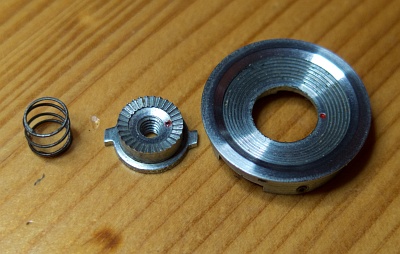
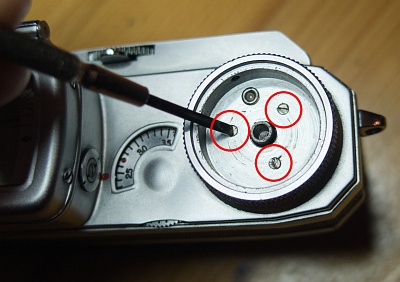
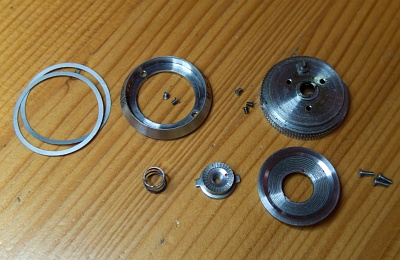
Let's start with the shutter release. 3 screws hold the inner part, the release button and a spring. The parts in detail.
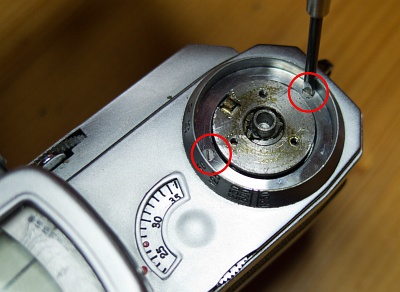
The ribbed cocking knob is held by 3 more screws inside.
The lower ring with the engraved times is held by 2 further screws. There are often 1 to 3 thin rings underneath for adjustment.
3. Rewindknob
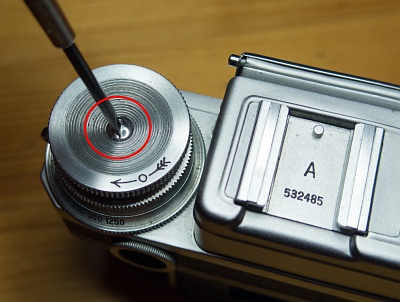
Loosen the screw at the top. The rewind knob and the GOST or aperture scale can then be removed. This one is engraved with DIN and therefore clearly made by Zeiss.
There is a washer and a spring inside.
The camera has an "A" engraved above the serial number. There are also some that have a Cyrillic "B" engraved on them. What the difference is is not yet fully understood.
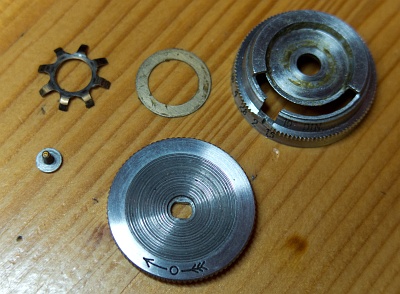
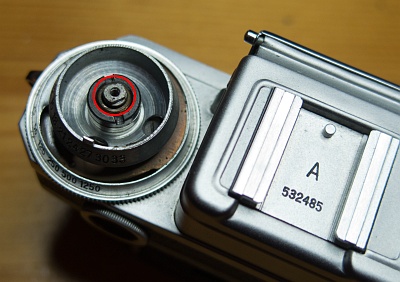
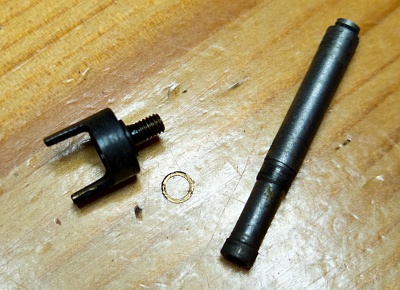
The next step is to remove the axle that holds the fork inside. This makes it easier to remove the cover.
It can be quite tight. Grip the upper part with a pair of pliers (circle) and turn the fork counterclockwise with a second pair of pliers.
4. Light meter cover
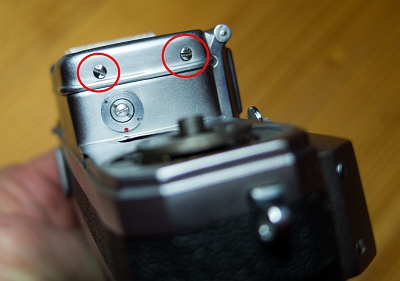
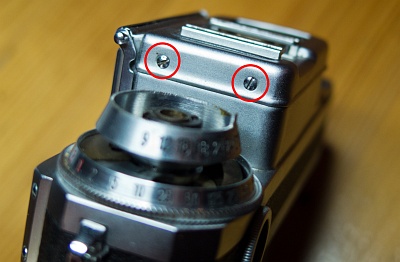
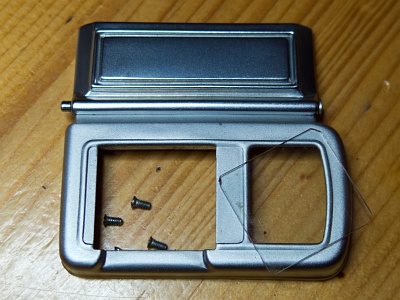
The light meter cover is held on the left and right by 2 screws each.
It does not need to be removed, but it is necessary to take it off to clean the glass cover of the light meter scale and the chrome.
The light meter adjustment screw can be seen under the two screws. It simply moves the scale. A clever idea.
5. Cover
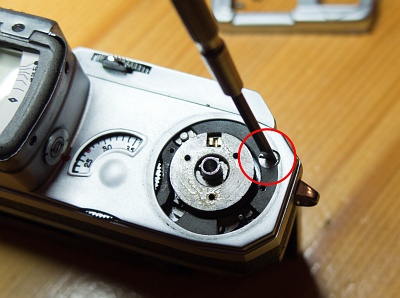
The housing cover must now be removed. First unscrew the large screw at the top.
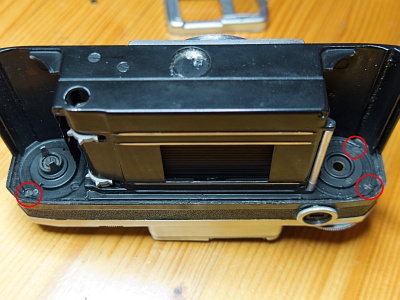
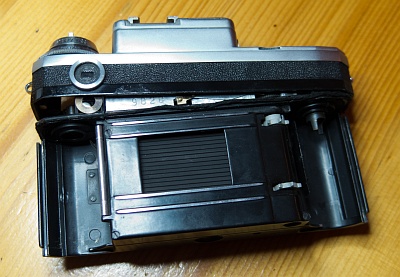
Turn the camera over and loosen the 3 marked screws. The cover can then be removed.
A woolen thread is glued to the edge of the housing. It is used to ensure that the back cover sits snugly.
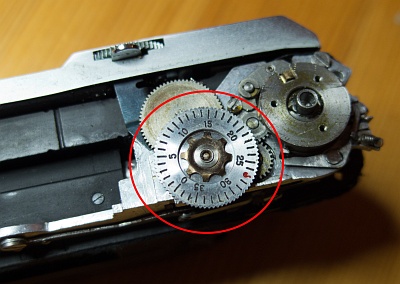
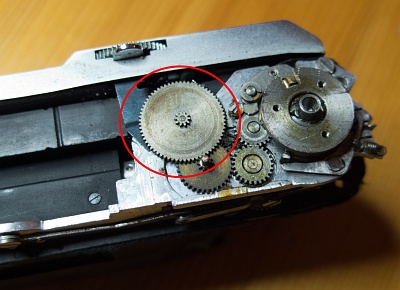
Then remove the film counter disk and the marked gear wheel. This and the other gears shown above should be cleaned and re-oiled.
6. Front mask
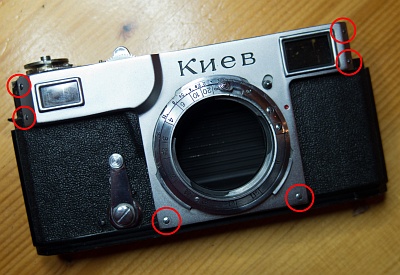
The front mask only needs to be removed if you want to clean the viewfinder lenses or remove the shutter completely from the housing.
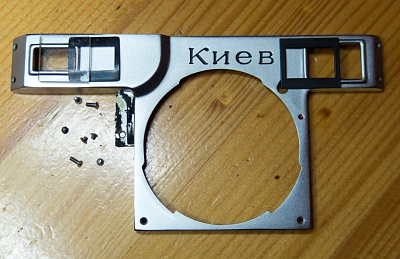
It is held in place by 6 decorative screws, the two on the left are shorter.
The seventh screw can only be accessed by loosening the leather covering over the “bump”. Make sure that the leather does not tear as it is very thin.
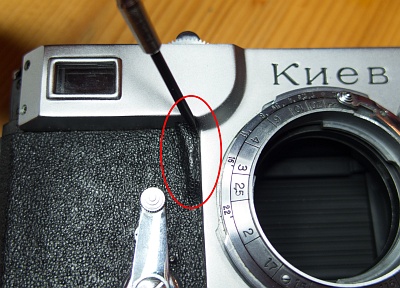
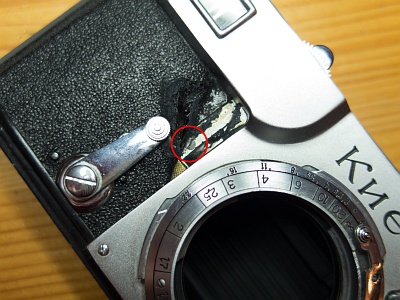
It can then be folded upwards over the focusing wheel.
The mask, left glass, viewfinder masks and all screws at a glance.
7. Shutter cap
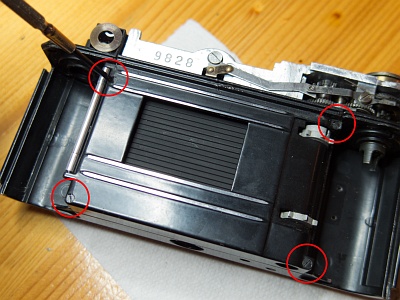
To be able to remove the cover, the 4 marked screws must be unscrewed. Depending on the model, they can be of different lengths and only fit correctly at the corresponding point.
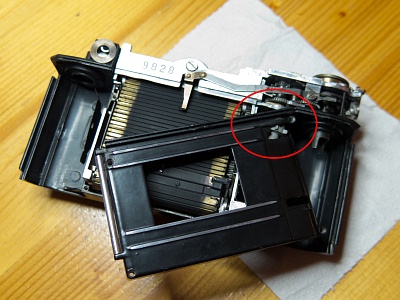
Now it gets a bit tricky. The cover must be removed over the two gear wheels and the transport roller. Turn the lid flat to the right and then tilt it upwards over the upper transport gear wheel.
Don't despair and don't use force! With a little practice, it is quite easy.
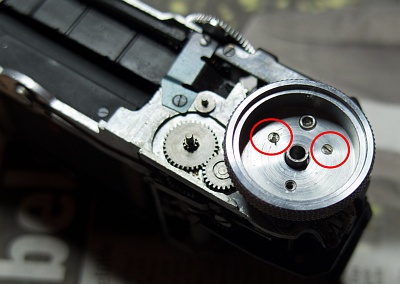
The winding knob should be reattached for the following steps.
8. Cleaning and lubrication
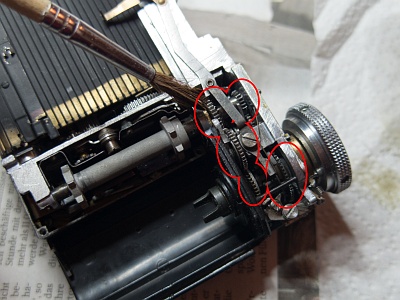
The marked gear wheels should now be cleaned with a little lighter fluid. Tension the shutter to reach all the teeth of the gear wheels.
Before releasing the shutter, always set it to "B" and hold the flat of your hand over the shutter blades when releasing the shutter.
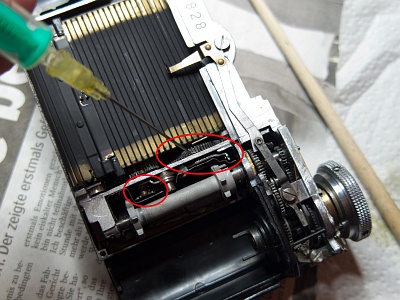
The shutter should start to run better as soon as you clean it. If this is not successful, it must be disassembled further. I leave this exercise to the reader.
After cleaning, the marked gears should be lubricated with a little oil. The best way to do this is with a syringe. But do not immerse the camera in oil! Tiny amounts are sufficient.
Now reassemble everything...
9. Ready!
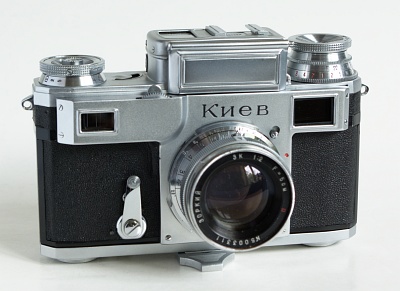
The reward for the effort. After cleaning all the chrome parts and then reassembling the camera, it looks as if it has just come from the factory.
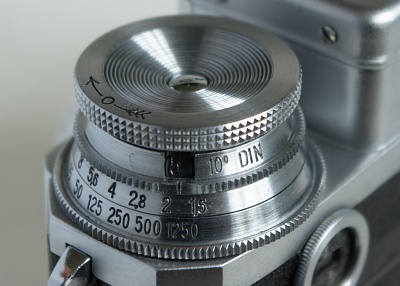
The DIN engraving on the setting ring of the light meter.