1. The shutter
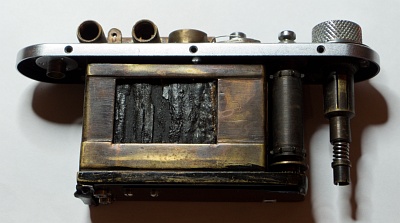
This shutter, which appears to have been repaired in a makeshift manner decades ago by painting over it, is now really useless.
So we should now replace the shutter cloths...
2. Removing it
2.1. Preparation
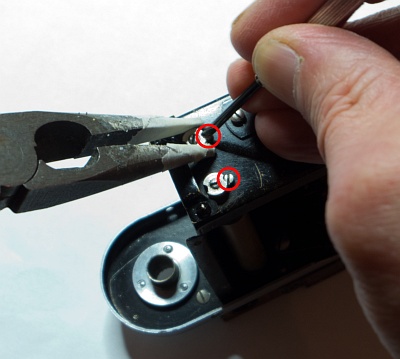
First of all, the camera is tensioned, as it is easier to reassemble when it is tensioned without the springs being wound up.
Now take a small pair of flat nose pliers, hold the nuts around the shutter springs and loosen the small fixing screws (see circles) with a suitable watchmaker's screwdriver.
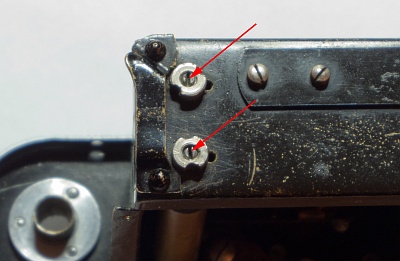
Now loosen the inner tensioning screws anticlockwise (while continuing to hold the nut with the pliers). Then remove the pliers and relax the spring clockwise until it is completely relaxed.
The nut and tensioning screw must turn at the same time. The springs are normally tensioned at the factory with approx. 4 to 6 turns. The nuts should be left on the screws for the time being.
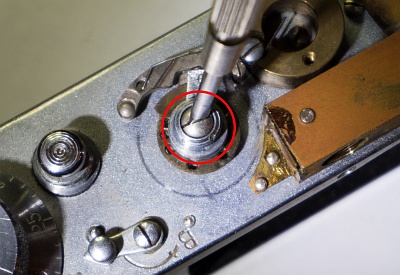
Now the speed disk and the knob for changing the speeds must be removed, as this is screwed to the axle of the large drum.
Loosen the screw (in the circle). Be careful, there is a spring underneath it. The knob for changing the speeds can then be removed.
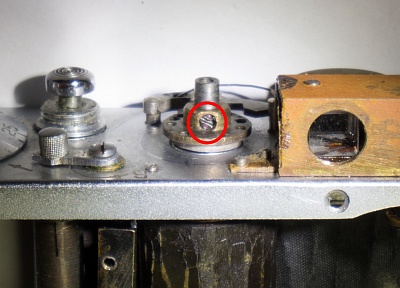
The speed disk itself is fixed to the axle of the large drum with a small screw. Remove the screw and remove the speed disk upwards.
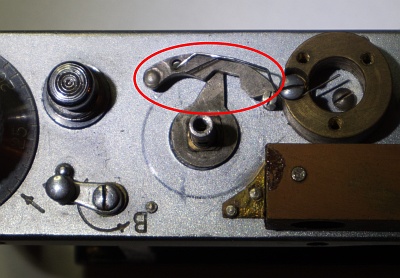
Unhook the spring from the small hole and pull the long delay lever upwards.
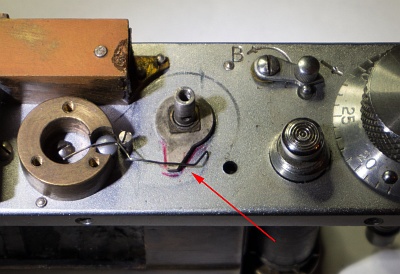
Very important! Be sure to mark the position of the driver with a felt-tip pen! It must be in exactly this position when it is installed.
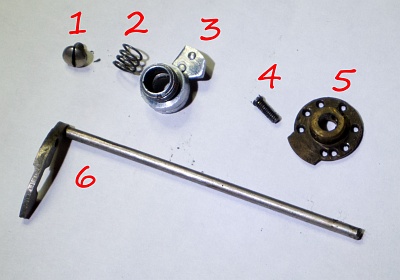
The parts for speed control:
1 upper screw
2 Spring underneath
3 Knob for adjusting the speed
4 Fixing screw for the speed disk
5 Speed disk
6 Delay lever
2.2. Disconnecting from the housing
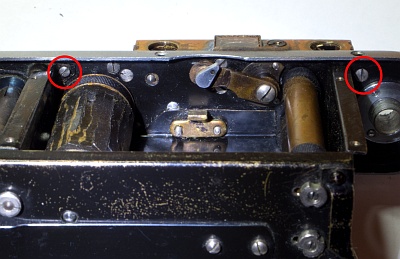
The shutter is held to the housing by 3 screws (see circles). Remove the 3 screws and pull the entire shutter off the housing.
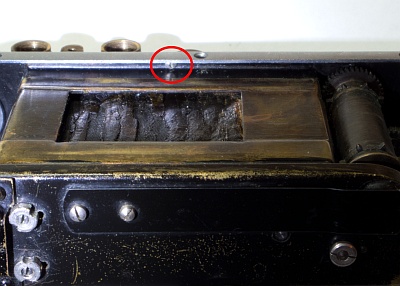
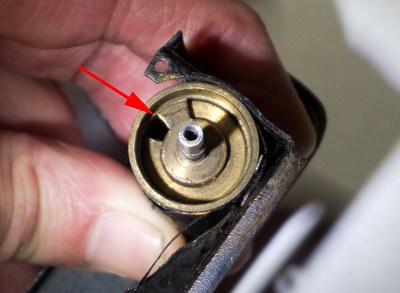
The hole in the large drum should be in this or a similar position when the shutter is tightened. Make a note of the position!
The position of the hole and the carrier can vary from camera to camera. However, they can usually be found in the position shown.
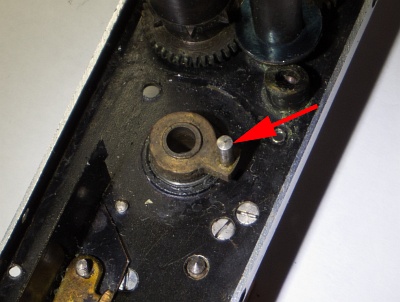
The lever on the large drum is in the corresponding position. We have noted its position by marking it on the top (see above).
When reassembling, the pin must snap back into the hole in the large drum.
II the exact position is not correct during assembly, either the speeds are not running correctly or the cloths do not close or overlap too far during tensioning.
2.3. Revome from shutter housing
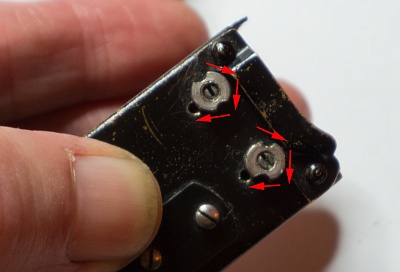
Now remove the nuts around the tensioning screws for good by unscrewing them clockwise. The tensioning screws on the inside must not turn at the same time.
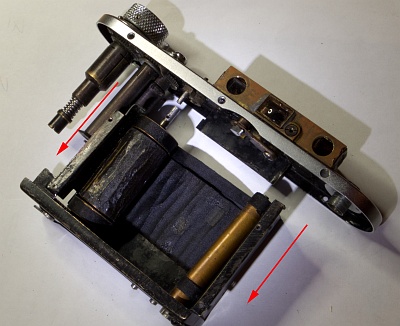
The shutter can then be removed from the shutter box. (bottom left)
Now remove the two screws at the bottom that hold the release leaf spring and the light shield inside the shutter box. (below)
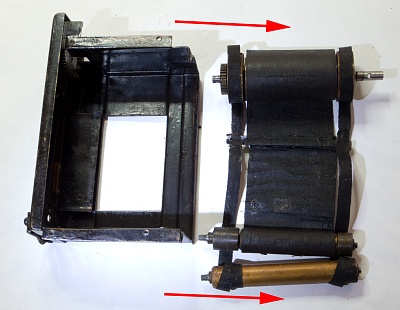
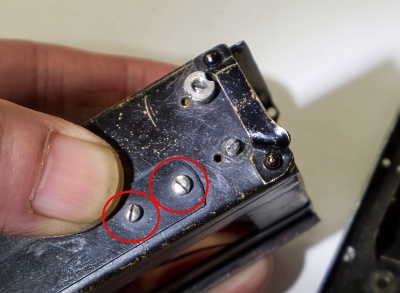
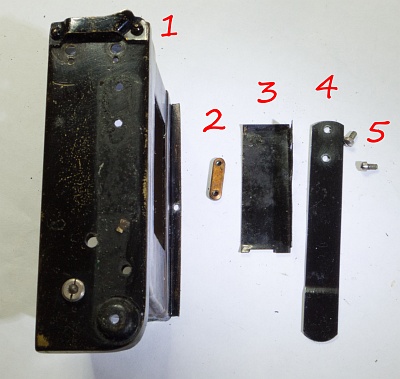
1 Shutter box
2 Threaded plate
3 Light shield
4 Leaf spring
5 Screws
2.4. Removing the old cloths
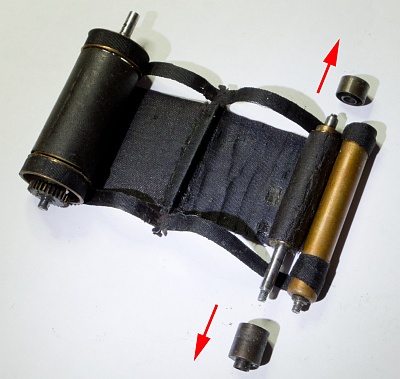
First remove the two sleeves located on the small drum of the first curtain. (left)
Then remove the first curtain from the small drum. The position of the first curtain on the small drum does not matter. (bottom left)
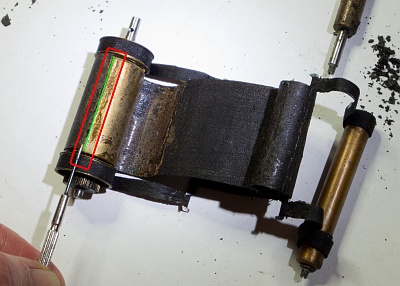
Very important! Mark the end of the second curtain on the large drum (green line). The speeds will only run correctly again if the new cloths are fitted in exactly the same position! (below)
If you are also planning to replace the belts, mark the position of the belts on the large drum! The position of the belts on the small drum of the second curtain is irrelevant.
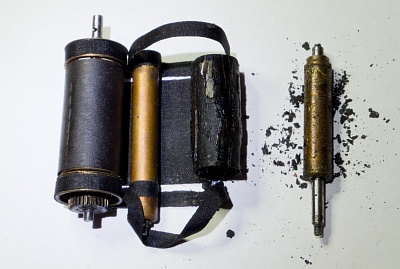
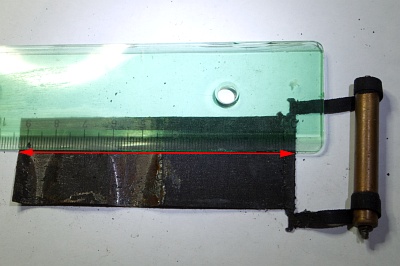
It is best to measure the length of the cloths before you remove them from the metal rods to which they are attached. Make a note of the length of the cloths or ribbons. The width of the cloths is usually 3 cm. (left)
Then cut open the seams with a sharp cutter knife and remove the adhesive residue from the metal rods. (bottom left and below)
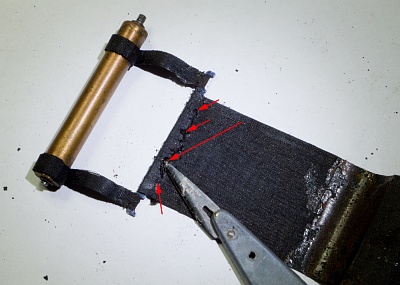
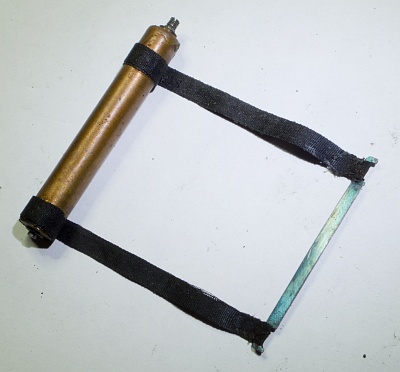
3. Interim result
After removing the old cloths and adhesive residue from the drums, we should now thoroughly clean the shutter box, all gear wheels and other parts with benzine and/or spirit and lay them out clearly.
I don't buy new sealing cloths cut to size but in one piece from a Japanese dealer on eBay. This allows me to work much more flexibly, as the fastening tapes, for example, are usually still in good condition and do not need to be replaced. The cloths can easily be cut to the required dimensions with a cutter knife.
4. Assembly
4.1. New shutter cloths
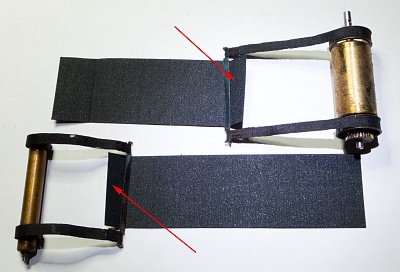
Cut the new cloths to the dimensions you noted earlier. Add approx. 1 cm in length so that you can stick them to the metal rods. The width of the cloths is usually 3 cm.
Lay the cloths down so that the fold is facing backwards and glue them in place with a suitable adhesive, e.g. UHU.
Sewing together, as was usual with the original cloths, is not necessary.
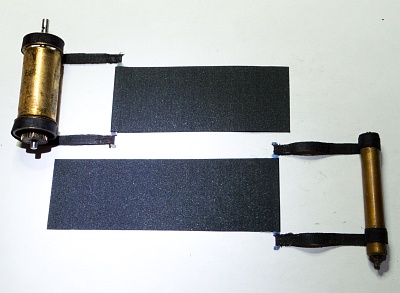
The new cloths are already attached here. The longer cloth is for the second curtain, the shorter one for the first curtain.
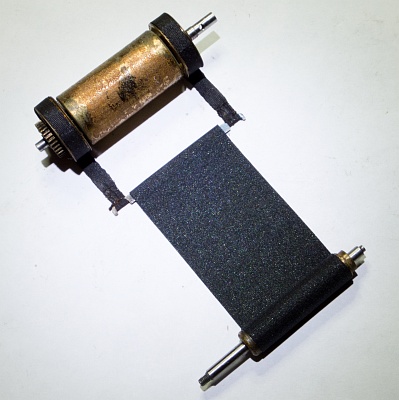
Attach the shorter cloth to the roll of the first curtain. Make sure that the cloth can roll up cleanly and straight. (left)
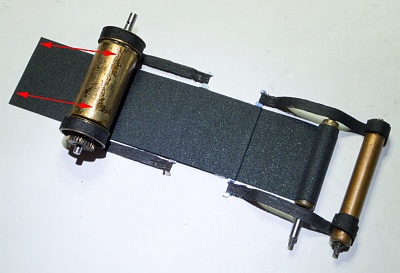
Place the second cloth over the first and slide it under the large drum. hindurch.
The edge of the cloth must come to rest EXACTLY at the previously marked point on the large drum and be glued there. (bottom left)
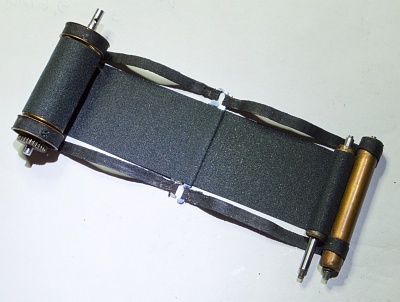
Both cloths are now glued and are in the correct position for re-installation in the shutter box. (below)
4.2. Installation
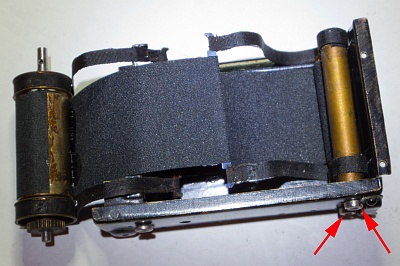
Now all that remains to be done is to reinstall the new shutter in the shutter box. As the new cloths are still quite stiff, it is easier to install them in the unrolled state (as if the shutter were stretched).
Slide the sleeves back onto the axle of the first curtain. Now push the end of the axle through the corresponding hole in the shutter box and screw the shutter nuts back on counter-clockwise.
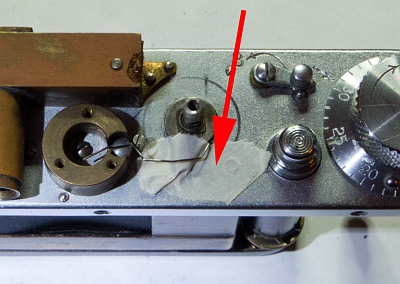
Before we push the shutter box back into the camera body, the lever should be fixed on the top so that it does not move during assembly.
Now comes the difficult part for which you actually need 3 hands. Therefore we continue here with fewer photos...
4.3. Inserting the shutter
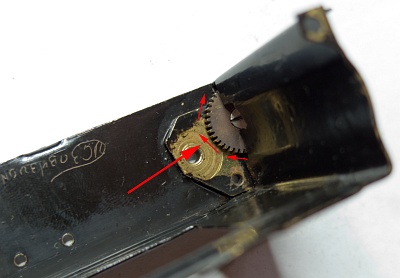
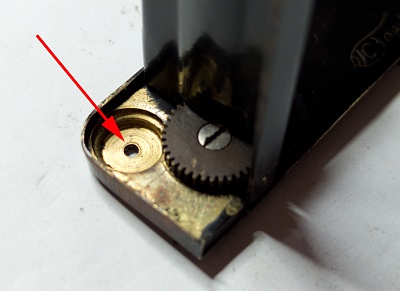
First turn the gear wheel at the bottom of the lock box clockwise as far as it will go. IMPORTANT!
Hold the axle of the large drum between two fingers with your right hand and turn it into the position shown in 2.2.
Use your left thumb to turn the large drum so that the hole is in the position shown.
Take the upper part of the camera in your right hand and slide the shutter box onto the housing. The pin must now engage in the hole in the drum.
At the same time, the end of the release rod must come to rest in the hole provided at the bottom of the shutter box.
Once this has been achieved, the first screw (next to the large drum) holding the catch can be screwed in.
4.4. Rollers for 1st and 2nd curtain
Once you have overcome this game of patience, you have overcome the biggest hurdle.
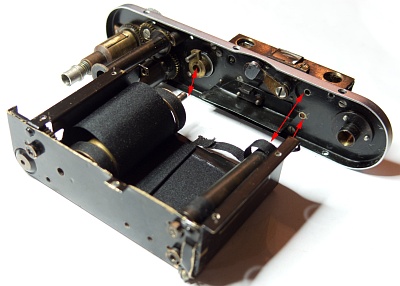
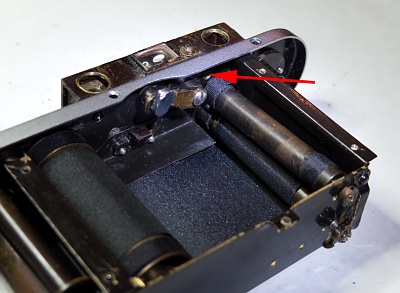
However, the two small rollers of the first and second curtains are not yet in the correct position. They have to snap into the corresponding holes, one of which is visible on the top.
Don't despair, you'll manage. At first you will want to throw everything into the corner, but eventually you will manage...
Once you have succeeded, screw the lock box tight with the two remaining screws. fest.
4.5. Tensioning and testing springs
Now tension the shutter springs by turning them both 4 turns counterclockwise and secure them with the locking screws.
Replace the speed control parts (see 2.1.) and reattach the release leaf spring and the light trap.
Release the shutter to test it. Does the shutter release? If so, half the battle is won. Now adjust the speed with the tensioning screws of the shutter springs.
Congratulations on your new camera! If everything went well, you will not have to repeat these steps again for the next 30 years.