1. First impression
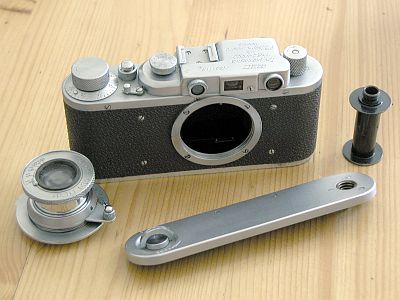
The freshly unpacked eBay package made a pretty good impression.
But let's start by taking a look under the hood...
2. Disassemble
2.1. Eyes out!
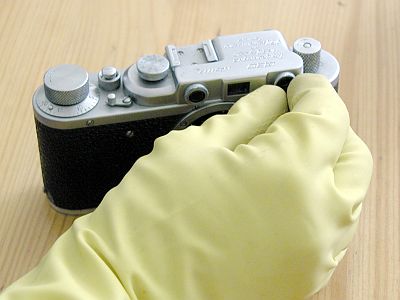
The "eyes" can usually be easily unscrewed with the aid of a rubber glove. If they cause problems, a pair of pliers padded with masking tape is a good help.
The "eye" of the rangefinder (left) consists of a cover nut and the actual optical unit, which is screwed into the housing. This is usually quite tight...
2.2. Remove housing
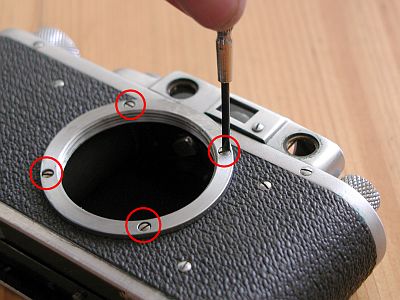
To remove the housing, first remove the screws of the lens mount.
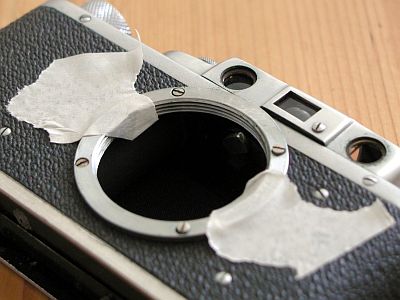
Since there are usually paper disks under the connection that influence the flange focal distance, I tape the thread to the housing with 2 strips of masking tape.
This prevents the paper disks from slipping. The screws can then be removed.
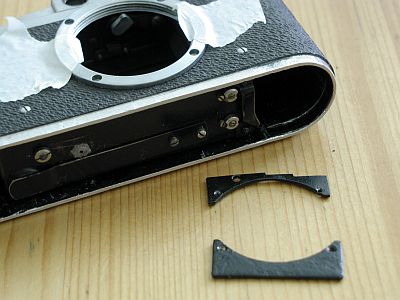
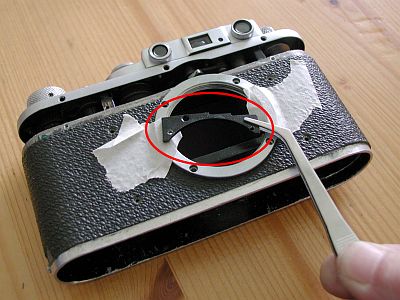
These two metal parts fall towards you when you remove the 4 screws. The upper one is characteristically jagged and has one more hole for the middle screw of the housing.
The lower part is surprisingly roughly crafted.
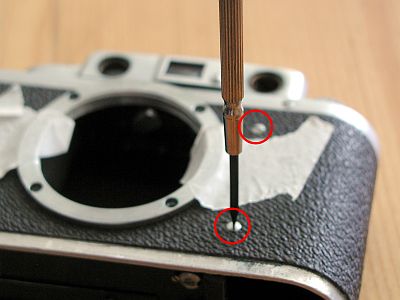
Next, remove the 4 screws on the front that connect the shutter to the housing.
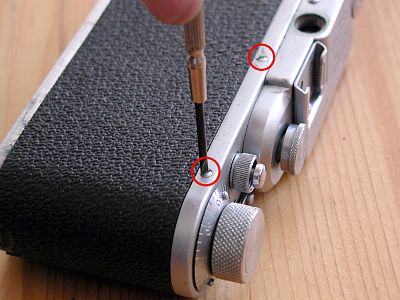
Then remove the 3 screws at the top of the housing on the front and back. The middle one on the front is a bit tricky ;-)
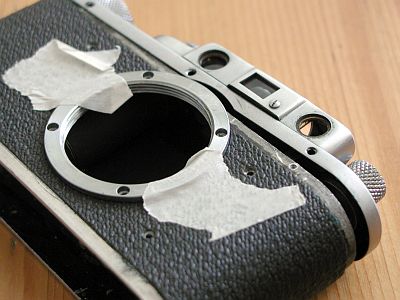
The housing can now be easily removed from the shutter housing with a little dexterity. Be careful, the vulcanite can be crumbly.
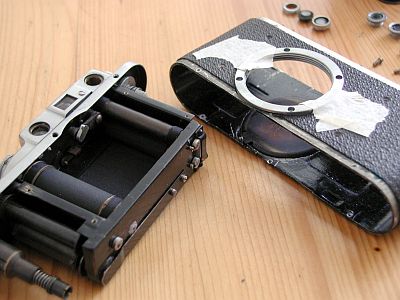
The housing has been removed. You can now see the shutter box on the left and the brass film pressure plate in the housing.
2.3. Remove cover
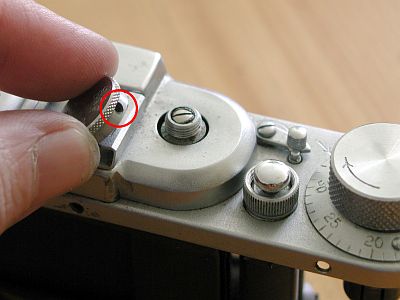
The first step is to loosen the timing wheel. The fastener is tensioned, the screw loosened and the wheel turned counter-clockwise. It is best to hold the large shutter drum firmly so as not to overstretch the straps and cloths!
The clamping knob is removed in almost exactly the same way: clamp the camera, loosen the grub screw, hold the gear wheel located under the clamping knob on the inside and unscrew the knob firmly in an anti-clockwise direction. Remove the film counter and washer.
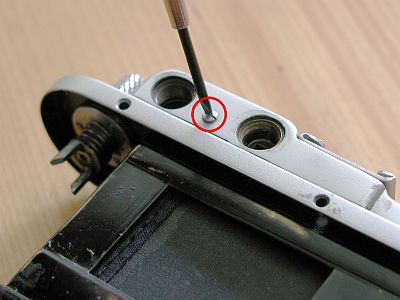
Now loosen one screw on the front and one on the back, located between the viewfinders.
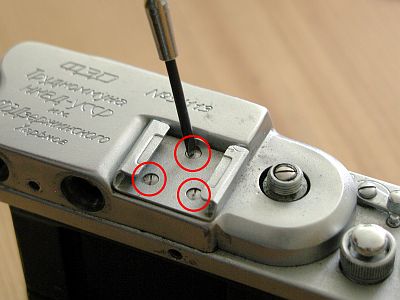
Remove the 3 screws from the accessory shoe.
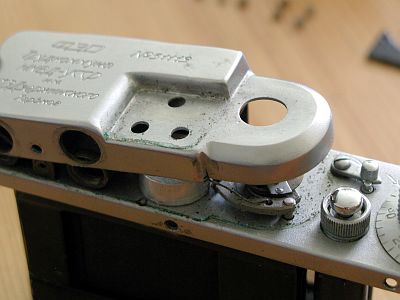
The cover can now be removed. You can usually expect a lot of dirt and verdigris from past decades...
The dirt must now be removed. The gear wheels must also be freed from the grime of decades and relubricated.
3. Interim result
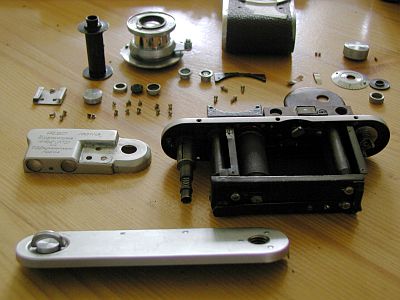
An overview of all the parts removed so far. It is worth laying out the parts clearly, otherwise one or two tiny screws will quickly disappear.
We continue with cleaning, oiling and adjusting.
4. Cleaning
4.1. Dental care
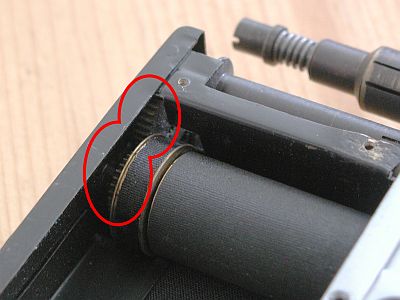
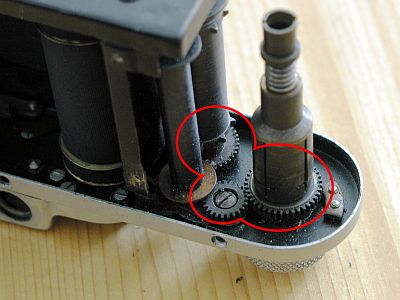
The marked gears and all other gears should be thoroughly cleaned with spirit. An old toothbrush is ideal for this.
Then lightly lubricate them with a non-resinous oil. Less is more here. Weniger ist hier mehr.
If necessary, the shutter speeds should now also be readjusted. You can find instructions on how to do this on FED-1 & Zorkij-1 survival site from Jay Javier.
If the shutter cloths are defective or porous, please take a look at my page on replacing the shutter cloths..
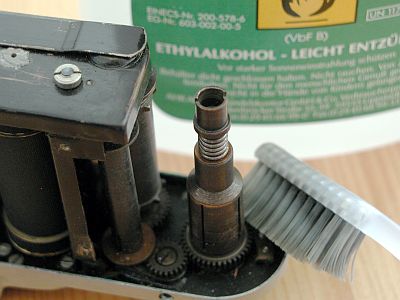
4.2. Cosmetics
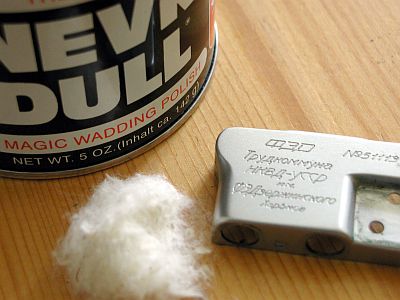
Now we come to the cosmetic part of the puzzle.
Take a little "NevrDull" (or a similar polishing pad, available e.g. in motorcycle stores) and rub the dirt off with light pressure.
Leave to work for a short time (1 to 2 minutes) and then polish clean with a lint-free cloth (e.g. an old pocket or kitchen towel).
All aluminum and chrome parts should now be treated as follows.
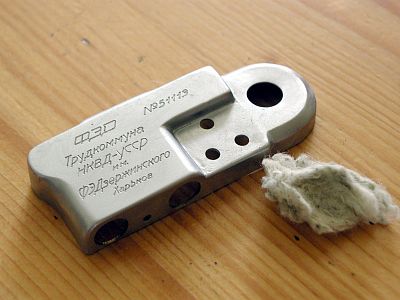
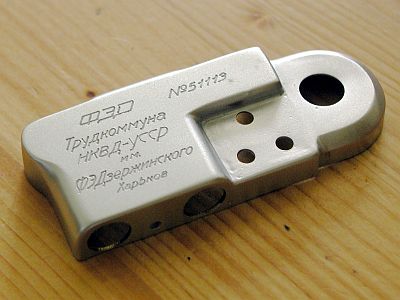
5. Assembly
5.1. Winding knob
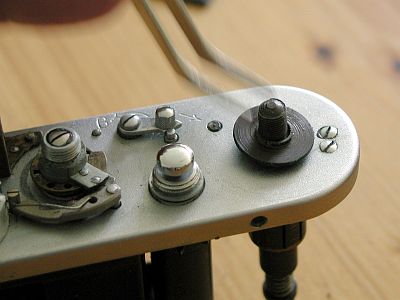
Ireally love the sentence “The assembly is done in reverse order”. So I'll document the assembly a little ...
First, I reassemble the winding knob.
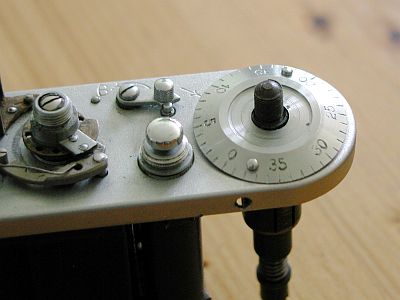
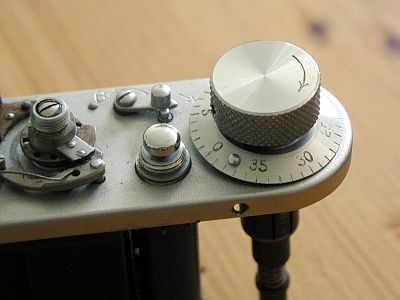
First put on the brass disk (the narrow edge facing upwards), then the film counter disk. Finally, screw the winding knob back on clockwise.
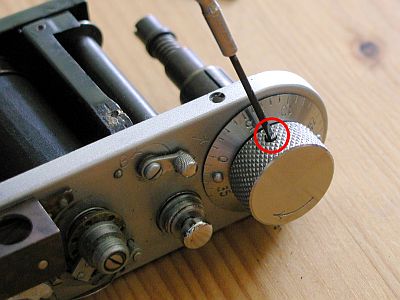
Do not forget to tighten the locking screw of the winding knob.
5.2. Put on the cover
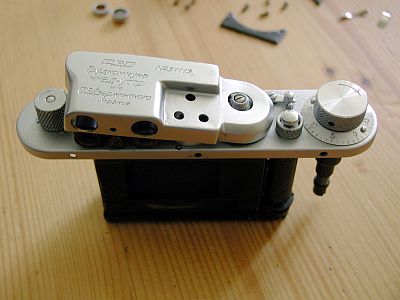
The cover can now be replaced.
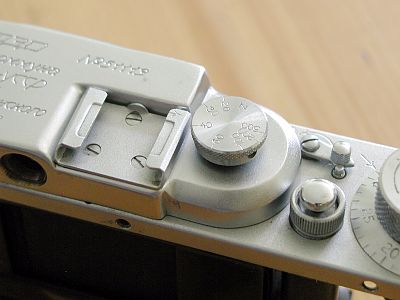
Screw the accessory shoe and timing wheel back on, securing the latter with the grub screw.
The camera should be cocked before tightening the shutter speed wheel. Then screw the wheel up to the time set on the shutter (opposite the arrow mark on the accessory shoe).
5.3. Eyes back in!
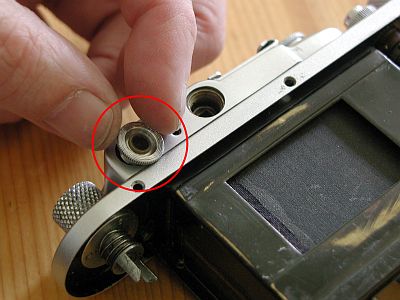
Now we give her back her face. First screw in the two rear eyepieces (in the right place, remember which one was where).
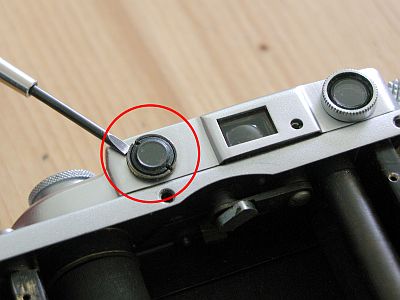
The lens of the rangefinder on the front must be inserted very accurately, as it is used to adjust the vertical offset of the mixed image. Turn it in until both images in the rangefinder are congruent in height. Of course, it should also be firmly in place. Then screw on the silver nut.
Only after adjusting the vertical offset is it possible to set the horizontal offset correctly.
5.4. Fastening the housing
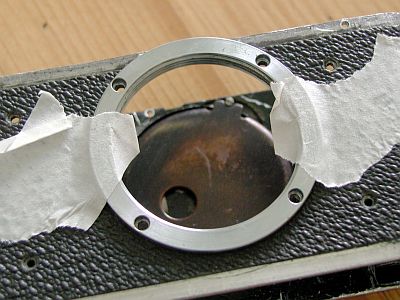
The two metal springs and the film pressure plate are inserted into the housing first. Press the film pressure plate down with your thumb, hold it in place and slide the housing over the shutter box.
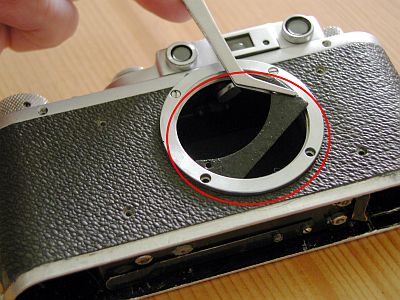
Now comes the tricky part. The two metal plates must be fixed in the correct position using the 4 screws of the screw thread connection.
Now insert the remaining 10 screws (3 at the top of the front and back and the 4 at the front to hold the shutter to the housing).
6. Lens care
6.1. Disassemble
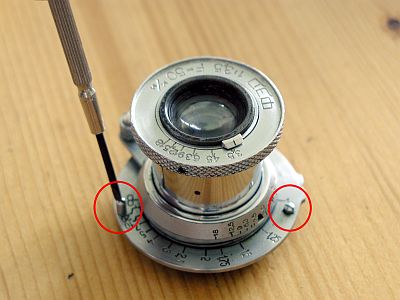
The FED 10 is quite low-maintenance and mechanic-friendly. Of course, after decades the lubricant has become hard or even disappeared completely and must be replaced.
Loosen the two limiting screws and unscrew the lens from its thread.
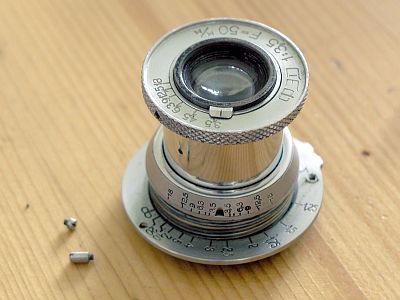
Pay attention to where it comes out of the thread and make a good note of it! It must be screwed back into the thread at exactly the same point later.
6.2. Cleaning
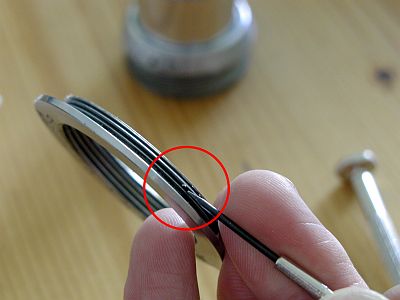
Scrape the old gunk out of the threads. A toothpick or (with a little care) a small screwdriver is suitable for this.
Then remove the residue with spirit and a toothbrush, for example, and wipe everything well. You can get your fingers quite dirty, so wash your hands before reassembling.
If necessary, the lens can be completely disassembled relatively easily, e.g. to clean fogged lenses. The front lens is held in place by a threaded ring, the rear lens block can be unscrewed after removing the jammed ring (bend the 3 tabs slightly forwards with a screwdriver).
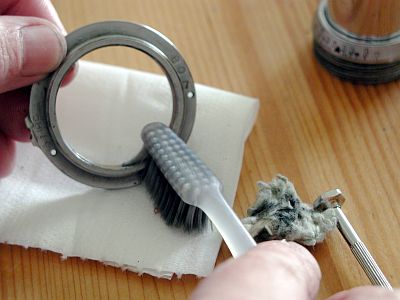
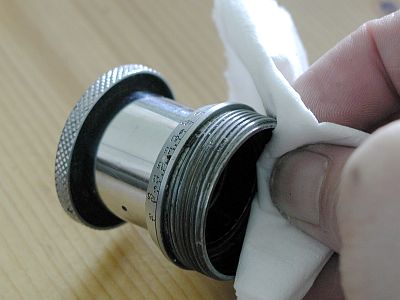
6.3. Lubricate
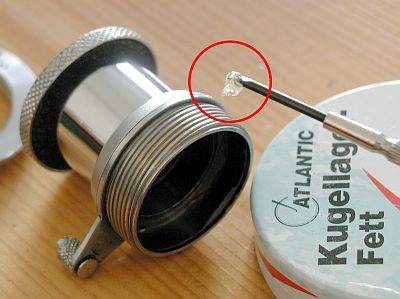
For relubrication, a grease should be selected that is temperature-resistant and does not start to run when heated. An inexpensive grease that meets the requirements is available from Atlantic, for example.
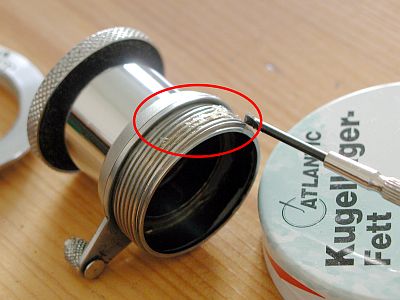
You don't need very much, about three times the amount shown at the top of the screwdriver is sufficient for the entire thread.
Spread the grease evenly, screw the lens back in at the correct position (which you have hopefully made a note of), insert the two limiting screws - done!
7. The reward
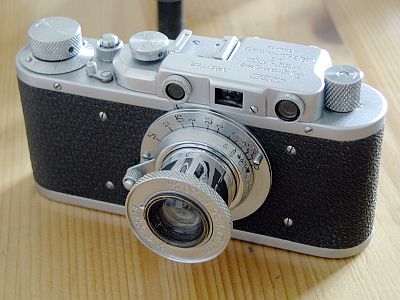
Et voila! A decades-old camera that looks like it has just come out of the factory.